Showing posts with label recipe. Show all posts

Tuesday, July 10, 2012

Happy Birthday Melissa!! (+ favorite recipe)

In honor of my sister's birthday today I decided to share what has been our favorite family recipe for about 3 years now.  It was my first healthy recipe to ever receive and we still absolutely love it!

When I asked my sister the other day what she was hoping to receive for her birthday, the only thing she said was "your peanut butter bars" so guess what...I'm about to head into the kitchen and whip some up!  She's going to get a little more than just the bars but that is to remain a surprise for now :-)

As for my sister, she is literally the best sister a girl could ever ask for.  I remember in high school being so annoyed with her and someone telling me the wisest words: Someday she'll be your best friend.  I sure scoffed at them then but their words proved true...she is my best friend!  I am blessed to live near my sister where our kids can grow up together and hopefully be best friends too (our 2nd sons were born only 1 day apart!).  My sister is the most loving, patient friend and mom.  She sacrifices more for her family than most people will ever know.  And she sacrifices much for me and my family as well.

This is a tribute to her and I hope she doesn't mind my sharing our last photo taken together:

Happy Birthday Melissa!!!


Peanut Butter Granola Bars


In a large bowl combine the following:
½ cup honey
Just over 1 c peanut butter (chunky or creamy – if creamy you can add some chopped pecans)
1 cup oats (I use ¼ c steel cut oats, ¾ c rolled oats – you can use all of one or whatever combo of both to get the consistency you like.  If you use quick cooking oats you might want to cut back cooking time a little)
¾ c granola
You can add anything you like – butterscotch chips, cc chips, chopped m&m (after cooking), etc…
Microwave for 2 min, mix ingredients
Microwave for an additional 2 min, mix ingredients
Cover baking sheet with wax paper or tin foil, spread mix over paper and let sit for a few hours.  (I actually cover over the top too and then use a rolling pin to roll them flat and even.  Then I refrigerate them.)
Cut into bars – enjoy!

Sunday, July 1, 2012

Chocolate Chip Bread Bites...or are they cookies??

Today was a special day for us.  My little guy turned 6!  I made these wonderful from-a-box cupcakes that were dairy-free, nut-free, egg-free, sugar-free.  (Believe it or not, they really are good!!)  At the party this one little cutie says "no thankyou" to the cupcakes.  I said, "Really? Are you sure?" and he said, "I've already had two donuts today.  I can't have any more sugar."  (Cheers to his mom!)  I was so impressed!  So I said, "Well, guess what!  These don't have any sugar in them!" and with that three kids at the table pushed them away and said, "Ew!  I don't want to eat these!"  Oh well...  You win some (1) and lose some (3).

I changed up my Recipe page and won't be posting any recipes on there from this point on but will be catching up on all the past recipes and re-posting them.  They will now be accessible to everyone.  Today I'm transferring over the recipe that has been on that page (for the past 6 months...oops it's July... so 7 months!) to this post. 

And I have a favor to ask.  If you look to the right ------------> where the "email" button is, would you please enter your email to receive subscriptions straight to your inbox when I publish new posts?  Once you enter it you will receive a confirmation email.  Just open the email and click to confirm.  I'd love to get my numbers up a little bit and would appreciate the help!  Thank you!!

Here's the Recipe.  It's a favorite!  I made it for our recent trip to California.  It traveled well and gave us energy for both Legoland and Sea World.  I hope you love it as much as we do!

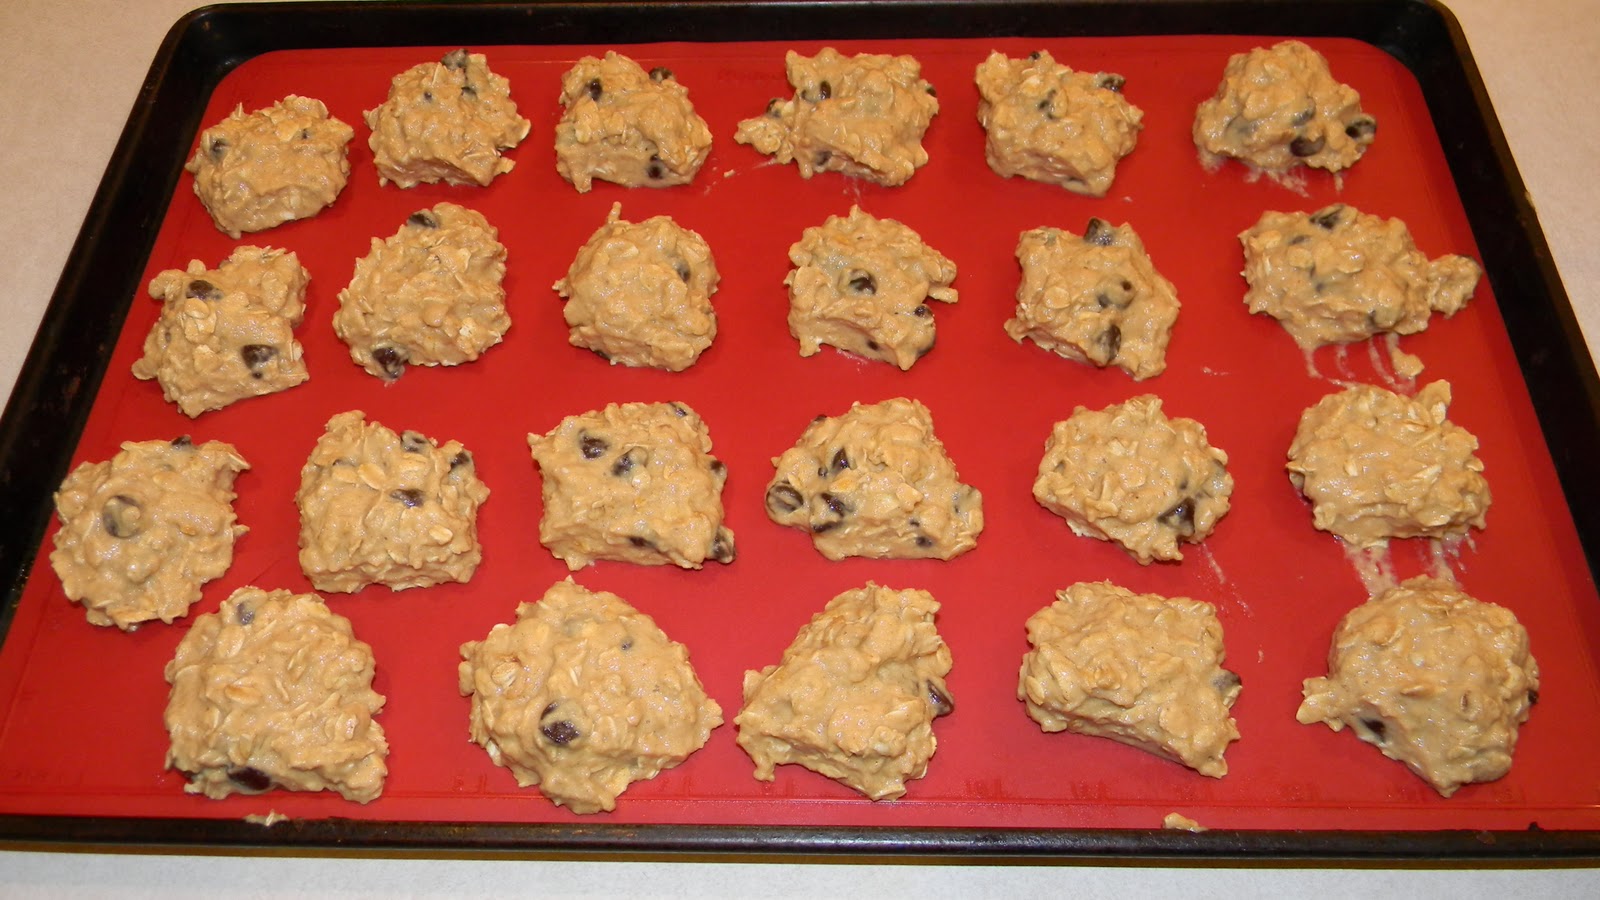
Re-posted from January 2012:  I found this recipe last week and immediately had to hop off my bed and run to make it.  It only has a few ingredients and is super quick to whip up, making them a truly perfect recipe.  BUT while they were called cookies in her blog (Chocolate Covered Katie), and they look like cookies, they do NOT taste like cookies.  Once I got over the non-cookie-tasting cookies, I loved them. 

I have adjusted a few ingredients and renamed the recipe to be Chocolate Chip Oatmeal Bread Bites.  Because they really are like eating little oatmeal bread bites...or Chippers as Paradise Bakery might call them.  They're great for a solid snack, easy to grab for on-the-go, great breakfast for kids before school (and they're sweet!).  They are gluten-free AND sugar free!  My kids didn't like them at first but, as with all of my clean-eating snacks, they are adjusting and just gobbled up a few of the ones that came out of the oven moments ago.  So here you are...have fun trying variations of this recipe and enjoy!


Chocolate-Chip Oatmeal Bread Bites

Ingredients
· 1 1/2 cups rolled oats
· 1 cup applesauce (or a little less)
· 1/2 cup organic or all-natural peanut butter (try with almond butter too!)
· 1-2 Tbsp pure maple syrup
· 1 tsp vanilla
· 1/2 tsp cinnamon
· 1/4 - 1/2 tsp salt (depends on how salty you like it)
· Chocolate chips (I didn't measure, just poured in until I was satisfied)
Directions
· Preheat oven to 350 degrees
· Mix all ingredients together in one bowl.  This is a moist dough.  I kept adding more oatmeal to make it a little stiffer until I got to the amount I listed above.
· Drop by spoonfuls onto baking sheet
· Bake for 30 - 35 min  (less if you like moister cookies, more if you want a more crisp top)
· yields 2 dozen
Isn't that the easiest recipe ever!  You can do raisins/craisins instead of chocolate chips.  Add in some chopped nuts.  Change out 2 over-ripe mashed bananas for the applesauce for more of a banana bread taste.  So many options!  This is super healthy.  Add in 1 T ground flax-seed for more of a health kick (ooh - why am I just thinking of that now?  I'm definitely doing that next time!)  Take out the maple syrup if you want it less sweet.

I hope you love these as much as I do!

With clean-eating recipes, food doesn't expand as it bakes.  Feel free to pack them on the tray!  They'll come out exactly the same size that you plopped them on at. (pre-baking pic)

Post-baking picture.  They look pretty much the same. 
Bake 5 min longer if you want them a little more browned on top.

Wednesday, June 27, 2012

Crunchies Recipe (i.e. homemade Clean granola)

I haven't made my "regular" recipes for a few months now...since I did my juice fast.  My clean-eating granola, cookies, brownies, muffins, etc...  I've stayed pretty much raw as far as food prepared in-home.  But this week for some reason I find myself needing something snacky and reaching for sugar again.  Seriously...what IS it with me and sugar?!?  Once an addict...always an addict. 

So tonight I decided it was time to get back to my recipes and make something that will satisfy my snack-need but still be healthy.  I tend to use my blog as my own personal recipe book (which I guess it is!) but when I looked up my Crunchies (i.e. granola) recipe, it wasn't here!  This is the #1 recipe I've recommended to people over the past year + and I'm embarrassed to see it's missing from my blog.  Time to correct that!

I had originally posted it in the Recipes section and then was rotating the recipes out every 2 weeks.  If you take a look in there you can see that hasn't happened in awhile.  So I'm going to update the Recipe section a little and just put the links to the recipes that are posted throughout the blog, and then make sure the recipes I've already posted are all here again and accessible. 

Amy's Crunchies


I originally posted this recipe on 9/10/11 and this is what I wrote:

This granola recipe has become the #1 breakfast and snack food in my house.  We eat it in a bowl with milk, sprinkled over Greek Yogurt or in baggies as a snack.  The kids love it in their lunches at school.  I love it when I need something sweet in the middle of the day. 

I did, however, find this recipe on Tosca Reno's Eat-Clean Diet website, posted by one of her followers.  Boy am I grateful she did post it!  The original name for it was "Chocolate/PB Eat-Clean Granola" (who wouldn't love that!).  We changed the name to "Crunchies" because my kids won't eat things with certain names.  Granola is one of their forbidden words ...they won't touch it if it's granola. (I know - they're weird.  They also won't eat a sandwich if you call it a sandwich.  Call it peanut butter bread and they're all over it.)  So one day I called these Crunchies and they downed the entire tray!


Ingredients 
·   2 cups of Oats
·   4 Tablespoons crushed raw walnuts (or other nut of choice)
·   a few Tablespoons flax seeds
·   1 tsp chia seeds
·   2 Tablespoons all natural nut butter (any kind you like)
·   1 tsp pure vanilla
·   3 Tablespoons raw honey
·   3 Tablespoons Coconut Oil
·   1/2 c chopped dark chocolate (70% or higher)
 Instructions
1.      Pre-heat oven to 300 degrees.
2.      Mix the oats, walnuts, flax seed and chia seeds in a mixing bowl.
3.      In a separate bowl add the nut butter, coconut oil, honey and vanilla. Heat in microwave in 20 second intervals until melted. Stir until nice and creamy.
4.      Slowly add the wet mixture to the oats and fold gently until all oats are covered and a bit moist. Fold in the chopped dark chocolate (or dark chocolate chips).
5.      Place a sheet of parchment paper or tin foil on a cookie sheet. Spread the oatmeal mixture on the parchment paper nice and flat. Bake for 12 minutes and then flip and move the oat mixture around, then cook for another 12 minutes. Let cool on the cookie sheet for 30 minutes.
Makes approx 3 1/2 cups of granola.

Preparation Time: 10 minutes
Cooking Time: 25 minutes

*My side notes: my family prefers when I make this with peanut butter and I usually add a little more than the recipe calls for.  My sister's family prefers it with almond butter.  Almond butter will make the granola come out darker.  Both taste great!  I double the recipe but pack it all onto one baking sheet so that it hardens into larger clumps, which make great snacks that are easy to hold. 

Serving suggestion: mix finished granola with other nuts, seeds, dried fruits and pretzels (if you're not going 100% clean) and make a trail mix.

Wednesday, June 20, 2012

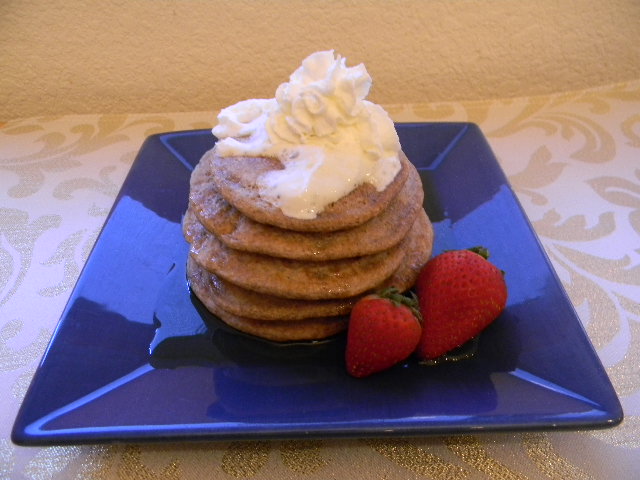
Amazing Lemon Blueberry Pancakes

I've tried dozens of pancake recipes over the past year, trying to come up with just the perfect one for my family.  I've found some decent ones but ususally there's something wrong... a strange smell... they're too heavy...or they just plain taste wierd.

I'd been using this recipe by Chocolate Covered Katie for awhile but the kids hated it and it had a strange smell.  I'm honestly not sure why but I think it might have been the whole wheat flour that I was using.  A few weeks ago I took this recipe and changed it a teeny tiny bit but what a HUGE difference it made.  I made them again this morning and the kids were RAVING... "Mom, you're the BEST COOK!" "These are the best pancakes EVER." etc...  I had to agree...they really were fabulous!  It only took a year to come up with something that would get as good of reviews as Aunt Jemima.  I feel like I can finally sit back and say "Job Done!"

Here it is...my edited version of Katie's blueberry pancakes.

Lemon Blueberry Pancakes

Ingredients
  • 1 1/3 cup spelt flour
  • 1/3 cup + 2 T oat flour (just put the oats in a blender/grinder and blend into powder)
  • 2 overflowing tsp baking powder
  • 1/2 tsp salt
  • 3 tsp pure vanilla
  • 2 T maple syrup
  • 1 1/2 cups almond milk
  • rind of one lemon
  • juice of 1/2 lemon
  • several handfuls of blueberries
Directions:

I tossed all the ingredients except the blueberries into my blender and blended until it was a smooth mixture, but you can also mix by hand.  Gently add blueberries.  Coat the frying pan/griddle with coconut oil and cook.  Because of the lemon and the spelt flour, these come out light and fluffy.  If you don't like lemon, replace lemon with 2 tsp cinnamon.

Enjoy!

**Note: Spelt Flour is not gluten-free


Saturday, June 16, 2012

Have I Fallen Off the Face of Earth? (+ new recipe)

I think the honest and real answer to my title is "yes".  Or maybe it's YES!!!  Some unexpected and difficult things have happened in my life the past few months to derail not just my blogging but pretty much everything I find enjoyable in life.  Nevertheless, while I may have disappeared as a blogger for awhile, I've continued to stay strong with my healthy eating lifestyle.  In fact, I've actually progressed to a whole new level!

I do want to (and will) eventually blog the details as so many people are asking me about it.  In short, I've learned about juicing, enjoyed a 21 day Juice Fast and as a result lost 10 lbs (gained back 4 for a grand total of -6!) and haven't eaten meat in nearly 2 months.  I'm loving my plant-based life!  (i.e. Vegetarian)

I have a few new resources to share that I've gained the past two months. 

For those interested in juicing, I'd recommend picking up anything by Jason Vale, otherwise known as The Juice Master.  Also I encourage everyone to watch Fat Sick and Nearly Dead (available on Netflix) or click the link to head directly to the website.  This will be the best hour and 1/2 investment you could put into your health!  And you'll fully understand why I chose to do a juice fast.  Finally I'd recommend Forks Over Knives (also on Netflix) for a deeper understanding of why I've chosen a plant-based diet.

All three of these resources have had a life-changing impact on me the past few months that have helped me more fully understand the WHY behind my choice to eat healthy and strive to obtain optimal health.

I've also changed gyms and hired a trainer.  I did my full-body test and came out as still being clinically obese, or as my trainer calls me "skinny fat".  And my age equivalency came out to be the same as a 59 year old woman (not to offend any of my beautiful 59 year old friends...but I am only in my 30's!).  So while I thought I was doing great, it turns out I have a looong way to go to obtain optimal health.  That whole pride coming before a fall has really hit me hard this month.  On the plus side, I am on the right track!

So, on to the recipe.  I was in California last week and fell in love with all the healthy vegetarian options everywhere I went (i.e. Legoland, Sea World, the beach!).  I discovered a fast food restaurant that served vegetarian and vegan food options!  Man I wish I could clone it here in Arizona.  It was called CBW (Crazy Bowls and Wraps) and it was listed as a "green" food fast chain.  Click the link to check them out and see if there's one by you. We went through the drive-thru each day and I love love loved one particular item on their menu.  Here's my version!

Indonesian Peanut Stir-Fry

1 grain (choose either quinoa, brown rice or white rice)
chop and lightly stir-fry your choice of veggies in coconut oil (8 or more for a nice variety)
Indonesian peanut-sauce (see below)

*optional - add black beans or tofu for an additional protein punch.  CBW grilled the tofu, cut it into chunks and added it.  Fabulous!!

Sauce: Whisk the following ingredients in a bowl until creamy (takes a few minutes)

1/4 cup peanut butter
3 T low-sodium soy sauce  (tamari or coconut amino's will work too)
2 T red wine vinegar (or 1 T cooking wine and 1 T your choice of vinegar)
2 T water (or a little more if the sauce tastes too strong for you)
2 tsp sesame oil
optional: 1/2 tsp red pepper flakes

Directions: Put 1/2 cup of your grain in a bowl and top with a generous helping of your stir-fried veggies, beans and/or tofu.  Put a dollop of the peanut-sauce on top and enjoy!

Some veggie suggestions: kale, broccoli, carrots, onion, bell-pepper, zucchini, yellow squash, egg plant, garlic...  Whatever is in your fridge!  This is a great recipe for cleaning out the veggie drawer and not letting anything go to waste.  This would taste great with pineapple chunks mixed in too.

Sunday, April 15, 2012

A TON of Oatmeal Recipes!

I have always hated cooked oatmeal so I find it kind of ironic that I'm writing about oatmeal today.  Or that oatmeal has become such a HUGE part of my diet at all!  I had no idea it was possible to eat raw oatmeal until a few months ago, when my sister introduced me to their raw oatmeal that they eat every morning.  It turns out that while I hate cooked oatmeal, oats in general I absolutely love!  It's a good thing too because they're rich in iron, which is something I seem to be really needing these days.

Oats are not only high in iron, they also provide a solid amount of protein and fiber.  They can be ground into flour or used whole.  You can find them in quick cooking versions (these have lower nutritional value as they are more processed), long cooking (these are what we eat/use.  I think they taste better) or steel-cut oats, which are harder to chew but pack a real nutritional punch!  Oats help lower cholesterol, regulate blood sugar and are incredibly healthy for the heart.  Seriously, what's not to love about oatmeal? 

Except...when cooked, I seriously hate the texture.  It's either slimy or so thick I'd need a glass of milk for every spoonful.  And they're sooo bland.  The only way I could eat oatmeal was in the instant flavored packets.  But once I started learning about eating healthy, I discovered how unhealthy those packets were.  In fact, the sugar and salt levels in them completely negated all health benefits of the oats!  (And the "diet" versions are actually much worse that the regular.)  I can't tell you how glad I am to discover that raw oats not only taste great but are even healthier than the cooked version.  (Any food cooked over 104 degrees loses nutritional value.)

Is it any surprise that I have a TON of recipes to share?  Some I'll give you links, some I'll type below for you.  Sorry I don't have many pictures.  (There are some things I just have to let slide these days and photos of food is one of them.)

Serving Size:  1/3 cup = 1 serving of oatmeal.  If you're focusing on weight control, be sure you keep a measuring cup with your oats.  I used to just dump from the container the amount that looked good to me until I discovered it was more like 2 servings worth.

Recipe 1: Melissa's Raw Breakfast Oatmeal

I name this for my sister who shared the recipe with me.  I can't remember if she created it herself or found it somewhere.  What I'm sharing below is how I make it, which is a little different than she does.  Same great results though!

1/3 cup whole long-cooking oats
pinch of salt
couple shakes of cinnamon
approx 1 tsp pure maple syrup
handful of raisins or craisins
non-dairy milk (we use almond milk...also rice or soy are good options)

Mix ingredients and add as much milk as you desire.  Let sit for 5 min.  The longer they sit the softer the oats will be.  Remember this oatmeal will be cold!  It's a different experience and one I was hesitant to try, but once I did...absolutely loved it!!

Recipe 2: Tosca Reno's Oatmeal-on-the-Go

This recipe is from The Eat-Clean Diet Recharged by Tosca Reno.  She keeps the following ingredients in baggies and carries them with her.  If she's out and clean food isn't an option, she simply asks for a bowl, spoon and hot water, whips out her oatmeal, adds water and has a full meal.  My kids eat this several days a week.  2 of the 3 love it (pretty good stats for my family).

1/3 cup whole oats + a little of each of the following (no worries if you're missing one or two):
wheat germ
ground flax seed
cinnamon
sea salt
protein powder
bee pollen
raisins or craisins (although they do have sugar)
*peanut butter
*maple syrup or honey

The * foods are ones we add in addition to Tosca's recipe.  Add boiling water and wait 3-4 minutes before enjoying.


Recipe 3: "Crunchies" (aka Clean-Eating Granola)


Ingredients
·   2 cups of Oats
·   4 Tablespoons crushed raw walnuts (or other nut of choice)
·   2 Tablespoons all natural nut butter (any kind you like)
·   1 tsp pure vanilla
·   3 Tablespoons raw honey
·   3 Tablespoons Coconut Oil
·   1/2 c dark chocolate chips
·   a few Tablespoons flax seeds
·   1 tsp chia seeds
Instructions
1.      Pre-heat oven to 300 degrees.
2.      Mix the oats, walnuts, flax seed and chia seeds in a mixing bowl.
3.      In a separate bowl add the nut butter, coconut oil, honey and vanilla. Heat in microwave in 20 second intervals until melted. Stir until nice and creamy.
4.      Slowly add the wet mixture to the oats and fold gently until all oats are covered and a bit moist. Fold in the chopped dark chocolate.
5.      Place a sheet of parchment paper on a cookie sheet. Spread the oatmeal mixture on the parchment paper nice and flat. Bake for 12 minutes and then flip and move the oat mixture around, then cook for another 12 minutes. Let cool on the cookie sheet for 30 minutes.
Makes approx 3 1/2 cups of granola.

Recipe 4: Tosca's Oatmeal Pancakes


This is our favorite pancake recipe, although I'll add one more at the bottom via link that is also fabulous.  The base recipe is Tosca's however I've changed a few things so if you find hers on-line, it looks similar but isn't exact.

Ingredients
• 2 1/2 cups dry rolled oats
• 4 whole eggs (or 6 egg whites)
• 1 cup milk of your choice
• 1 Tbsp ground flax seed
• 1 Tbsp Coconut oil
• 1 1/2 tsp baking powder
• 1 tsp vanilla
• 1 tsp cinnamon
• Coconut oil for cooking the pancakes
**Our favorite way to eat these is to leave out the cinnamon.  Add juice of 1 lemon + the grated rind of the lemon.  Add about a cup of blueberries.  YUM!!
Preparation
  1. Place all ingredients in a blender or food processor (except blueberries if you're using those...add those at the end whole). Blend the mixture for 20 seconds. The resulting mixture should be smooth. Melt or pour 1 tbsp coconut oil into your frying pan. Heat over medium heat. Pour 1/4 cup of pancake mixture on the hot surface. Cook until the pancakes are dry and bubbly on the edges. Bubbles should appear on top, as well. Turn and brown the other side. (These take longer than normal pancakes to cook.)
  2. Always use pure maple syrup, never the cheap fake versions.  This is always your best option for both flavor and health.

Blueberry Pie Pancakes (and a whole lot of other choices): 
http://chocolatecoveredkatie.com/chocolate-covered-recipes/pancake-pandemonium/

Energy Bites (my kids call them chocolate balls): http://naturallysweetsurprises.blogspot.com/2012/03/pinterest-or-pin-uninterest.html

Clean-Eating Muffin Cookies:
http://naturallysweetsurprises.blogspot.com/2011/09/muffin-cookies-for-breakfast-or-any.html

Alrighty...there are actually SO many oatmeal recipes I keep coming across that I'll have to do another blog with more of them.  Here's my most recent one and a current favorite.  It was so good when I made one batch (and ate straight from the bowl) that I had to make a 2nd batch while the ingredients were still out.  It uses oatmeal flour.  I just put raw oats into a mini food processor and a few seconds later have flour!  I do sift it before adding to the bowl.

No Bake Peanut-Butter Pretzel Bars  (leave pretzels out to make them GF)
http://chocolatecoveredkatie.com/2012/04/09/no-bake-peanut-butter-pretzel-bars/

You can probably tell from these recipes that I also love peanut butter! 

All of this reminds me that I have to bring a casserole for my MOPS group this next Wed.  Guess what I'm bringing...OATMEAL CASSEROLE!  (A recipe all the moms love, and one I'll have to share next time because I actually have to locate the recipe :-).

Enjoy and please share your feedback: which you tried and what you thought.


**Note on oats...they are gluten free naturally however Quaker Oats are processed in a plant where other wheat products are processed.  There is a high chance there will be cross-contamination.  Try Bob's Red Mill for truly GF oats.

Sunday, March 18, 2012

Pinterest or Pin-uninterest?

Are you a fan of Pinterest?  I'm guessing that 85% of you reading this are fans of this new social/creative-idea-sharing website.  I have not joined nor do I see myself joining anytime in the near future.  I know it might help grow my blog or my photo props business, but honestly I'm already on such idea overload that I'm not sure adding one more website will be beneficial to my brain.  So for now...I graciously decline all of the invites many of you keep sending me.

That said, there was a recipe from Pinterest that a friend shared on Facebook today.  The minute I saw it, I knew I had to try it.  And boy am I glad I did!  I wasn't able to access the actual recipe (it took another friend to get it for me) but for those of you who can, here's the original recipe and all of her notes so that you can go re-pin it and encourage the originator: http://pinterest.com/pin/215046950926882633/ 

For those of you in my pin-uninterest camp, the recipe is below.  These, to me, are the closest tasting to chocolate chip cookie dough I've made.  And it's almost-raw, clean and oh so healthy!  What surprised me was that 1) the kids were willing to try them right away (we've come a long way, baby! and 2) the kids...and me...couldn't stop eating them!  These are super easy and really worth making.  The kids are excited to have them in their lunches tomorrow.

The original maker calls them: No-Bake Energy Bites Recipe
I would simply call them "Chocolate Chip Oatmeal Cookie Dough Balls"
Ingredients:
1 cup (dry) oatmeal (I used old-fashioned oats)
1 cup no-sugar-added coconut flakes
1/2 cup chocolate chips (I use free trade dark chocolate chips)
1/2 cup peanut butter (I use Kirkland Signature natural peanut butter)
1/2 cup ground flaxseed
1/3 cup honey
1 tsp. vanilla
Method:
Stir all ingredients together in a medium bowl until thoroughly mixed. Let chill in the refrigerator for half an hour. Once chilled, roll into balls of whatever size you would like. Store in an airtight container and keep refrigerated for up to 1 week.
I made mini dime-sized balls perfect to pop into little kids' mouths.  Towards the bottom of the bowl it was hard to make it stick together so I dumped the rest into a baggie and shaped it into a granola bar size bar and tossed it in the fridge.  I don't know how many it makes because we ate so much!  But I still have an entire Ziploc storage container full in the fridge.  Sorry I don't have a picture to add.  Maybe tomorrow...

Enjoy!

*the only change I made from the original was the coconut.  She put to use toasted coconut.  I used un-toasted no-sugar-added coconut flakes from Sprouts.  Really good!!


Friday, January 20, 2012

Samer's Hummus Recipe

I've received quite a few requests for recipes so I decided to re-post this most requested one (my friend Samer's hummus recipe).  I'm also making it a little easier to find recipes by posting links on my "Recipes" page to all previous recipes in my blog, by title.  You can always type in "recipe" into the search bar also to pull up any blog that uses that word.

I wanted to thank all the new people who have become members of my blog on Google.  It's fun to see new faces on there!  I'd really like to get my Feedburner numbers up, so if you haven't subscribed to my blog via email, please take about 30 seconds to do that.  To the right of the screen you'll see the words "follow by email".  Just type in your email and hit submit.  Then you will need to go to your email and verify your subscription in the link that Feedburner will send you.  You'll automatically receive each updated posting straight to your email from that point on!
Super easy and thank you in advance!

On to the recipe...  Samer's Hummus recipe is the best I've made...and I've tried plenty!  I was so grateful when he shared this with me and allowed me to put in on my blog.  I has been my most requested recipe to re-post so here you are!

Samer's Hummus


This is how it looked when Samer made it. 


Ingredients

*2 15oz cans of Kuner's Garbonzo beans (no salt added)

1/2 tablespoon of salt

1 tablespoon of garlic powder

1/4 cup olive oil

1 cup of Tahini (I found it at Fresh & Easy...Samer gets it from Middle Eastern markets)

1/3 cup of lemon juice (approx the juice of 2 med lemons)

1/4 cup of water (if desired...I needed it)

Directions:

Empty cans into food processor or blender, 2/3rds drained. You need the liquid in there so the beans don't stick to the sides.  If cooking your own beans, add water or it will really clog your machine.

Add the salt and garlic powder and turn on the processor/blender.

Keep an eye on it and make sure the beans are moving and not sticking to side. If they are, add just a little bit of water to keep it going. Let run for 2 minutes or until the beans look less and less grainy...

While it's still running, add the olive oil, tahini and lemon juice

Let run until desired smoothness. You can add more of any of the ingredients to desired taste. I've discovered if one of the ingredients' flavor is overpowering, adding some water or tahini helps balance it out.  The longer you let the processor run, the smoother the texture will be.

Plate, and decorate with fresh chives, tomatoes, paprika, and cumin powders. Drizzle olive oil on top.
My notes:* I used dry beans, soaked them for 24 hrs and then boiled for 1 hr.  Make sure the pot is full of water because it will boil out by the end.  This is supposed to be a money saver however when it heats my house and I'm paying for AC to cool it down and it's 108 outside...I'm thinking go with the canned beans.  In the winter though...great way to warm up the house and add humidity!  I used about 2 cups cooked beans.

Serving suggestions:  Serve for dinner, as a dip for a party, appetizer, etc...  Dip chips, pita bread, crackers, pizza crust (my method of choice tonight!), or cut veggies such as green/red bell peppers, carrots, celery, etc...